Mosaic Backsplash Design: The Detail That Changes Everything
Let’s be real — mosaic backsplash design sounds simple, right? You pick a tile, slap it on the wall, call it a day. Done.
But then… reality hits.
You start laying those tiny pieces, and suddenly, it’s a puzzle. The tiles don’t line up. The grout dries too fast. That one crooked line mocks you every time you walk into the kitchen.
Yeah. It’s not as easy as it looks.
Here’s the truth: a backsplash can make your kitchen or bathroom. It’s not just there to keep sauce off your drywall — it’s what ties the whole design together. The mood, the color balance, even how your lights reflect at night.
At Anderson Tile & Granite, we’ve seen it all — the perfect installs and the “oops, we should’ve called a pro” moments. Whether it’s a sparkling glass mosaic in The Woodlands or a rustic stone backsplash in Conroe, we help Texas homeowners bring beauty, precision, and staying power to their projects.
This guide? It’s the no-fluff version. Straight talk on what works, what doesn’t, and how to make your mosaic backsplash design a statement piece that actually lasts.
Key Takeaways
Mosaics do more than decorate. They define your kitchen or bathroom’s personality.
Planning matters. Good design saves you from crooked lines and cracked tiles.
Material choice is everything. Stone, glass, ceramic — each has its mood and care needs.
Installation isn’t “just tile.” It’s precision work that takes experience and patience.
And yes, pros like Anderson Tile & Granite make it easier. Way easier.
Why Mosaic Backsplash Design Matters
Here’s the thing about mosaics — they’re not new. Ancient Romans were laying mosaics before electricity was a thing. Why? Because tiny pieces can create big art.
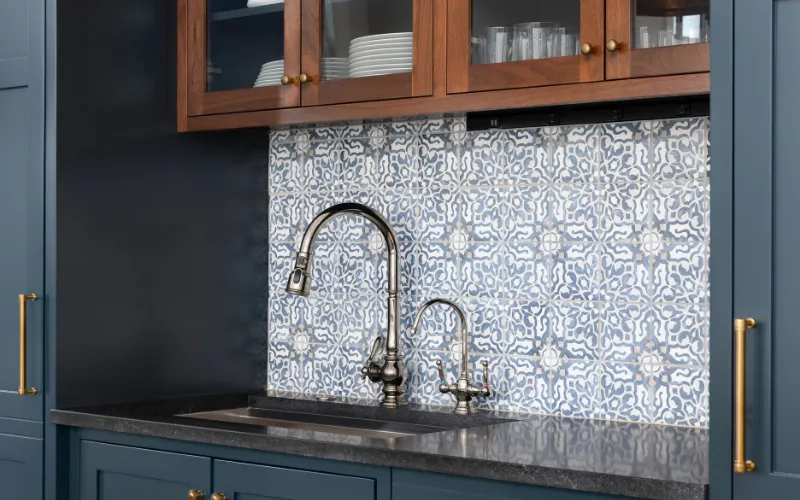
A mosaic backsplash design gives you freedom. You can mix colors, materials, and shapes to match your vibe. Want modern? Go with glossy glass or clean marble. Want cozy farmhouse? Try tumbled stone or ceramic.
But this isn’t just about looks. A backsplash protects your wall from moisture, grease, and heat. And with the right materials and sealant, it can last decades. Literally.
Mosaics work because they give flexibility. They wrap around outlets, corners, or oddly shaped spaces that big tiles can’t handle. It’s like painting — but with stone and glass.
Still, all that freedom? It’s dangerous if you don’t plan. That’s why pros take time to map layouts, measure, and check lighting before even opening the thin-set bucket.
Materials: Picking the Right Tile for the Right Space
Alright, let’s talk tile.
Not every material is created equal. Some shine (literally). Some absorb. Some are fragile divas that look stunning but demand maintenance. Here’s a breakdown:
Glass Mosaics
They sparkle. They make small kitchens look bigger. But — and this is important — they’re not forgiving. Glass shows smudges and fingerprints, and cutting it needs diamond blades. It’s best left to pros who know how to keep edges clean.
Ceramic & Porcelain
The classics. Affordable, versatile, and easy to clean. Perfect for both kitchens and bathrooms. Porcelain’s denser, which means it holds up better in steamy environments (hello, Houston humidity).
Natural Stone
Timeless. Elegant. Heavy. Stone mosaics like marble, travertine, and slate add instant luxury. But they’re porous — so they need sealing and extra care. That’s the trade-off: beauty for maintenance.
Metal & Mixed Material
You’ll see more of these in modern homes now — brushed steel, copper, even stone-glass mixes. They catch the eye. But less is more. Use them as accents, not the whole wall, unless you want your kitchen to look like a spaceship.
Design & Layout: Where Art Meets Math
Designing a mosaic backsplash is equal parts creativity and geometry.
You don’t just slap sheets up. You plan. Measure. Stand back and see how the lines interact with your cabinets, outlets, and windows.
Start by finding your focal point — usually behind the stove or sink. Everything else aligns with that center. Then, dry-fit your sheets before installing. (Trust me, this one step saves hours of rework.)
Watch for edge cuts. Avoid awkward slivers at corners. And always — always — make sure your pattern flows. One crooked line in a mosaic? You’ll notice it forever.
Lighting matters too. Under-cabinet LEDs can make glass mosaics glow or expose every grout flaw. Test lighting before you grout.

The Installation: Where the Magic (and Mess) Happens
Here’s where most DIY-ers panic. And for good reason.
Installing mosaics is all about precision and patience.
Step 1: Surface prep. Your wall must be flat, clean, and primed. Any bump or unevenness will show.
Step 2: The right adhesive. Not all thin-sets work with glass or stone. We pick based on tile material — something most homeowners overlook.
Step 3: Sheet alignment. Those mesh-backed sheets? They can stretch or shift. We use spacers, levels, and a rubber float to press them evenly.
Step 4: Grouting. Use unsanded grout for delicate materials like glass, or sanded for stone. Pick a color that complements, not competes.
Step 5: Sealing. Especially for natural stone. It keeps moisture, oils, and stains from creeping in.
And yes — grout haze removal is real. So’s cleanup. It’s messy. But when you step back after sealing that final section? Worth it. Every. Time.
Common Mistakes People Make (and How Pros Avoid Them)
Even the most confident DIY-er can make these classic mistakes:
Skipping prep. The wall has to be smooth, or tiles won’t stick right.
Wrong adhesive. Glass and stone each need specific products.
No layout check. You can’t “eyeball” mosaics. Trust us.
Too much grout. Makes your design look muddy.
Not sealing. Especially in humid Texas kitchens — mold’s best friend.
That’s why hiring pros like Anderson Tile & Granite saves you from rework (and regret). We’ve spent years fixing “weekend projects” that went sideways.
Why Homeowners Choose Anderson Tile & Granite
Here’s the thing — we don’t just install tile. We build experiences.
We care about precision, sure, but we also care about how you feel when you walk into your kitchen. That moment when sunlight hits your new backsplash and you go, “Yeah. That’s it.”
From consultation to cleanup, we handle it all — design help, material sourcing, installation, sealing, even post-job inspection. We’re licensed, insured, and local.
Our work stretches across Greater Houston — Magnolia, Conroe, The Woodlands, and beyond. Texas homes, Texas style.
Because at the end of the day, your backsplash isn’t “just tile.” It’s part of your story.

FAQs
Q1: How long does mosaic backsplash installation take?
Usually 1–3 days, depending on size and material. Glass and stone can take longer for precise cuts.
Q2: Can I install mosaic backsplash myself?
You can, but it’s tricky. If you’ve never tiled before, hire a pro. It saves money (and stress) in the long run.
Q3: Do mosaic tiles need sealing?
Only if they’re natural stone or porous. Glass and ceramic tiles don’t need it, but grout usually does.
Conclusion
A mosaic backsplash design isn’t just decor. It’s an upgrade. A little art for your everyday life.
Plan it right, choose your materials wisely, and install it with care — or better yet, call people who’ve been doing it for decades.
At Anderson Tile & Granite, we turn messy renovations into beautiful results. Real craftsmanship. Real results. Real local service.
Call to Action
Ready to turn your backsplash from basic to breathtaking?
Call Anderson Tile & Granite today at (832) 562-5304.
We’ll bring samples, ideas, and that Texas-level craftsmanship right to your doorstep.
Let’s make your walls shine — one mosaic at a time.
