The Real-World Guide to Backsplash Installation (Without Losing Your Mind)
Let’s be honest for a sec — backsplash installation looks simple.
You pick some nice tile, grab a tub of grout, maybe watch a few YouTube videos… and boom, dream kitchen, right?
Yeah, not exactly.
Because once you actually get into it, things get real. Fast.
It’s not just slapping tiles on the wall — it’s prep work, leveling, spacing, choosing the right adhesive, cutting tricky corners, and somehow keeping it all perfectly straight. One crooked line? You’ll see it every single time you walk in for coffee.
That’s where Anderson Tile & Granite comes in. They’re not just installers — they’re artists who understand structure, detail, and design. From quartz masterpieces in The Woodlands to elegant marble finishes in Conroe, they’ve turned plain walls into wow moments for homeowners all over Greater Houston. And honestly? That’s why they’ve become the go-to backsplash pros in Texas — trusted for their craftsmanship, precision, and no-shortcuts attitude.
When done right, a backsplash doesn’t just protect your walls — it transforms your entire kitchen or bath. It’s that final touch that makes everything feel cohesive, complete… intentional. So if you’re ready to finally upgrade that blank space behind your counters, this guide’s for you — no fluff, no jargon, just real advice from people who’ve been doing it right for years.
Key Takeaways
Great design starts with prep — not tiles.
Every backsplash has a purpose beyond looking nice.
Choosing the right material saves you years of regret.
DIY is fun until grout starts cracking.
When in doubt, call the pros (yep, like Anderson Tile & Granite).
So, What’s the Point of a Backsplash Anyway?
A backsplash isn’t just there to “look cute.”
It’s functional armor for your walls. Every splash of water, every bit of oil from the stove, every drop of wine — that’s what the backsplash defends against. Without it, you’d be scrubbing drywall stains forever.
But beyond protection, it’s also personality. It’s what gives your kitchen that final, finished touch. The contrast behind the stove, the texture that catches light, the rhythm of tile lines that guide the eye across the room.
It’s small, sure. But it matters. A lot.
When it’s installed properly — flat, clean, sealed — it feels like it’s always been part of the home. When it’s done poorly? It screams “DIY weekend gone wrong.”
Choosing Your Material (Because It’s Not All Just “Tile”)
The first decision — and honestly, the most important — is what your backsplash is made of.
Ceramic and Porcelain Tiles
The classics. Affordable, easy to clean, and available in thousands of styles. Porcelain’s a bit tougher than ceramic — it’s denser, handles heat better, and holds up in steamy kitchens or bathrooms.
Glass Tiles
Sleek, modern, reflective. Glass bounces light beautifully, especially in smaller spaces. The catch? It can show smudges easily. And cutting glass tiles isn’t for the faint of heart.
Natural Stone (Marble, Slate, Travertine, etc.)
These add instant luxury. The texture. The warmth. But they need care — sealing, resealing, cleaning with the right products. Skip that, and your elegant stone could stain or dull.
Metal & Mosaic Mixes
You’ll see these behind stoves or as accent stripes. Stainless steel or copper adds character. Mosaics? They’re trendy, but be prepared for lots of grout lines.
💡 Pro Tip: Larger tiles = less grout = easier cleaning. But smaller tiles can add depth and movement. Choose based on where it’ll live — not just how it looks on Pinterest.
The Unsexy But Crucial Part: Preparation
You can’t skip prep. You just can’t.
Even the best tile will look awful on an uneven wall. Here’s what we do before we even open the adhesive:
Clean everything. Dust, grease, old paint — gone.
Flatten the surface. No bumps. No dips.
Measure twice. Outlets, switches, windows — everything has to line up.
Dry-fit the layout. We literally place tiles first to visualize it. Saves major headaches later.
Use the right adhesive. Porcelain needs a different thinset than glass or stone. You can’t use one-size-fits-all here.
That’s the kind of attention to detail that separates pros from weekend warriors.
At Anderson Tile & Granite, we’ve fixed plenty of “DIY experiments.” Crooked lines. Cracked grout. Tiles popping off after a few months. And every time, it comes back to one thing — rushed prep.

The Step-by-Step Backsplash Installation
Let’s walk through what the process actually looks like.
Step 1: Layout
We always start with the focal point — usually the center of the stove or sink. Everything else radiates from there. Straight lines are everything here.
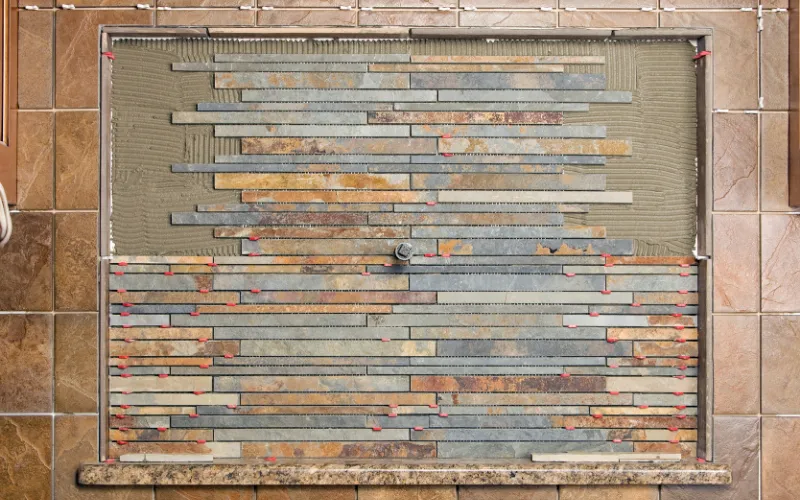
Step 2: Applying Adhesive
A notched trowel spreads the thinset evenly. We only do a small area at a time so it doesn’t dry out. Every tile gets a little press and wiggle — to lock it in place.
Step 3: Spacing and Alignment
Tile spacers keep lines clean and even. After a few rows, we step back. Look at it. Adjust. A few millimeters off now can look like inches later.
Step 4: Cutting and Edges
Outlets, corners, trim — that’s where craftsmanship shows. We use wet saws for precision cuts. No jagged edges, no chipped corners.
Step 5: Grouting
Once the adhesive sets (patience matters here), we mix and apply grout. Not too wet, not too dry. Then wipe it down gently — too soon and you’ll wash out the joints, too late and you’ll scrape forever.
Step 6: Sealing & Caulking
Natural stones need sealing. Grout often does too. Finally, we caulk the bottom edges where the backsplash meets the countertop — because water will always try to find its way in.
That’s the full dance. Step by step. No shortcuts.
The Mistakes Everyone Makes (Once)
Even with the best intentions, it’s easy to go wrong. Here are the big ones we see again and again:
Not checking for wall level before tiling.
Using the wrong adhesive for the tile type.
Ignoring grout color (it changes the whole look).
Forgetting to seal natural stone.
Rushing the curing process.
Every single one of these mistakes shows later. It might look fine at first, but after a few months, cracks, stains, uneven lines.
That’s why pros exist. We’re not just faster; we’re meticulous.
Why Choose Anderson Tile & Granite
Because you don’t want to redo this in six months.
We’ve been serving homeowners and builders across Greater Houston — from Magnolia to Humble to The Woodlands — for years. Our crew doesn’t just install. We design, we guide, we listen.
Here’s what makes us stand out:
We handle everything. From design consultation to final cleanup.
Licensed and insured. Your home is in safe hands.
Local experts. We understand Texas humidity, temperature shifts, and the right materials for our climate.
Quality craftsmanship. Every cut, every joint, every tile is placed with care.
Transparent pricing. No hidden costs. No “oh by the way” fees halfway through.
We don’t just build backsplashes. We build trust.

Quick FAQ
1. How long does backsplash installation take?
Usually one to two days, depending on size and complexity. Custom designs or stone may take longer.
2. Do I need to seal my backsplash?
If it’s stone or porous tile — yes. Ceramic or glass usually don’t need sealing.
3. Can I install a backsplash over existing tile?
Sometimes, yes — if the old tile is flat and secure. But often, removing it gives cleaner, longer-lasting results.
Conclusion
At the end of the day, backsplash installation isn’t just about tile.
It’s about care. Planning. Patience.
It’s the mix of precision and creativity — the part of remodeling where art meets utility. A small space that makes a huge impact.
So if you’re tired of staring at that blank wall behind your sink, or if you’re ready to give your kitchen a touch of class — start here. Start with quality. Start with people who know what they’re doing.
And that’s Anderson Tile & Granite — where craftsmanship meets character.
Call to Action
Thinking it’s time to finally upgrade your backsplash?
Let’s talk.
📞 Call us today: (832) 562-5304
📍 Visit us: 24333 Riley Rd, Plantersville, TX
🕒 Hours: Monday–Friday, 8:00 am – 5:00 pm
Serving Houston, Magnolia, The Woodlands, Conroe, and all surrounding areas.
Let’s make your backsplash — and your home — unforgettable.
